Stitch Swap by Wild Olive

Thursday, March 29, 2012

StitchSwap1 StitchSwapB
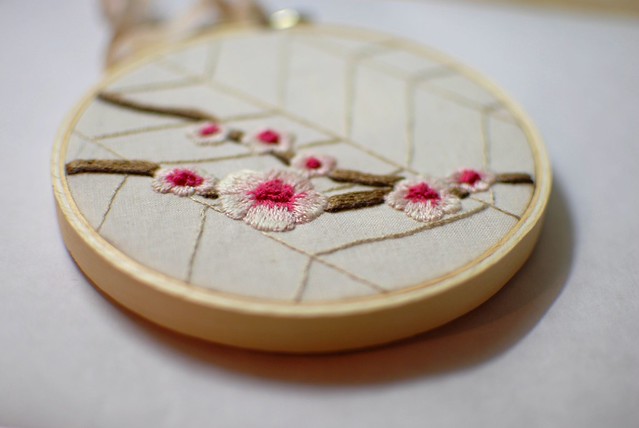
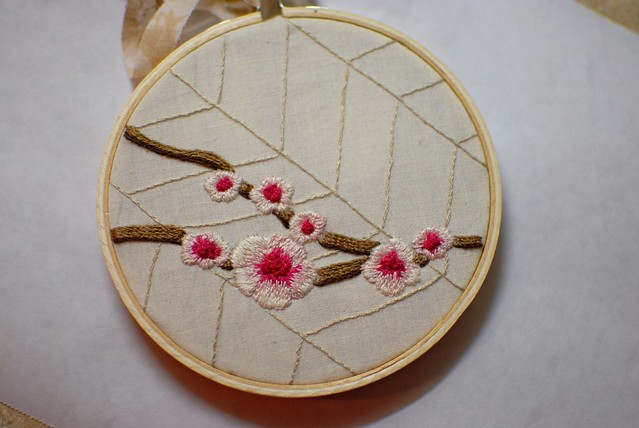
I am finally done! This little one, only 4 inches wide, is for Wild Olive's Stitch Swap!


This is my own design...cherry blossoms on branches. Living in the Washington D.C. area, I couldn't resist doing cherry blossoms. I've never actually been to the cherry blossom festival down by the river, and I think I might be very allergic to these little guys. But I love the pictures the papers and magazines come out with each year. The pinks and brown combo is one of my color palette favorites.

I did a lot of Internet research for this one, but I didn't find too many embroidery designs with filled petals. Lots of outlining, which I guess is kind of what embroidery is mostly about. But I wanted some pop, some color, and with the help of this wonderful, gorgeous, fantastic site, Needle N' Thread, I managed to do a beginner job at some shading. It came out "okay" in my opinion. Yeah, pretty good for a beginner.
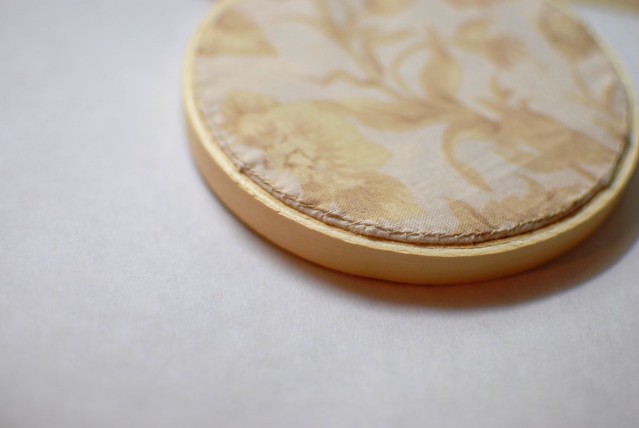
StitchSwapC
The back. Finished.

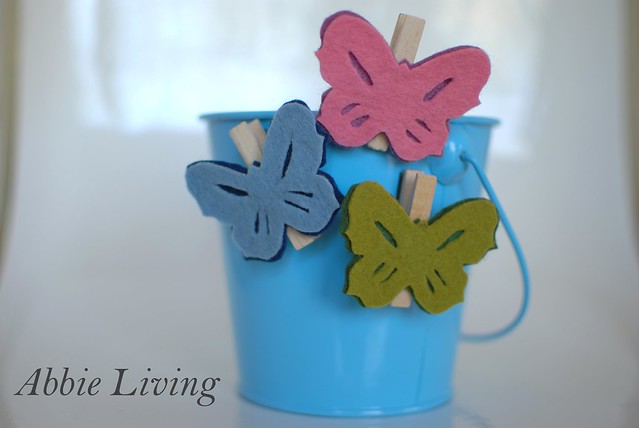
...and a few more fun tid-bits to tuck in that package to my secret recipient. I hope she likes it!
DSC_0954

If you are interested, here is the Flickr link to the other stitch swaps everyone else in the group put together. They are really cute!

Molli from the blog, Wild Olive, is the host of this wonderful endeavor, and she hinted that there will be another embroidery swap in the fall this year! So if you are interested, stay tuned to her blog!

Felt Butterfly Clip Magnets - Tutorial

Wednesday, March 28, 2012

FeltButterflyMagnets
More butterflies. Ah yes, more. This time in fuzzy felt in some uplifting spring colors. These are easy and quick to make. And in this household they are very much needed.

For years we've had kiddie magnets on the fridge. And some random magnetized cars that "crawl" up anything metal too. These kiddie magnets migrate around the house. They become walking hazards, wined up in the wash, and like-wise lost in this abyss we call home. So, I felt a need in my inner-being for some grown-up, crafty, magnets for my portion of the fridge/freezer that no small hands can touch.

The other problem, besides the juvenile nature of our message keeping, is that the magnets available don't always stick well. A take-out menu sometimes requires two or three magnets to keep it safe from the floor and the mouth of my 10-month-old-paper-eating-mischief-maker. These actually stick and they hold paper in their cute little clip. And I am proud to say, these are a bit more "elegant", if you would, than the I-Iguana magnet I am staring at right now.

Materials:
  • Felt in varying complementary colors (I used 100% felt here. But the poly kind will do just fine too.)
  • Sharp fabric scissors (and a pair of sharp smaller scissors is useful, though not necessary)
  • Regular scissors (to cut through the magnetic tape...never, never, use your precious fabric shears on things other than fabric, like, say, fritos bags, like my husband does.)
  • Pen (ball point will do)
  • Butterfly pattern - download here
  • (2) kinds of glue (Use Elmers or something else runny for the felt-to-felt part. Fabri-tac will do too. And use something creamy for felt-to-wood.)
  • A small dish
  • An old paint brush (for the glue)
  • Small clothespins (these are 1 3/4 inch)
  • Magnetic tape (or you can use round magnets too, or any other type of magnet strong enough to hold up the clip, the felt and some paper.)
How To:

1. Print out and cut out the butterfly pattern. (I transferred mine to a piece of cardboard for durability, but this step isn't necessary.)
DSC_0968


2. Choose two contrasting colors of felt and trace around the butterfly pattern onto each piece of felt. Use the fabric scissors and cut around each tracing.


DSC_0974
3. With a pen, draw in the lines on the wings onto the felt butterfly that will be applied on top. (I just eye-balled this. You can too...alter the pattern if you want.)

DSC_0975 DSC_0976
4. Use the fabric scissors and carefully cut out each pen line. Bend each wing piece and used the tip of the fabric shears to snip a small slit along the pen line. Open the wing back up and insert the tip of the fabric shears into the slit and cut out the pen line.

DSC_0981 DSC_0982
5. Decant about 1 teaspoon of runny glue and add 1/2 teaspoon of water to the small dish and mix to combine with the paint brush. Brush the entire surface of the felt butterfly with no holes with glue. Apply the other felt butterfly piece on top and press gently to adhere. (The glue here will help the felt stiffen a bit, which will help durability.)

6. Add a dab of craft glue (the more creamy stuff) to the middle of the clothespin and press the felt butterfly on top to adhere.

DSC_0986 DSC_0987
7. With the regular scissors, cut a 1 1/2 inch length of magnetic tape and cut it again in half lengthwise. Remove protective paper and adhere to the back of the clothespin. (If you are working with regular magnets, the craft glue will come in handy here.)

8. Let the piece air dry and then hang it on your fridge and clip your latest and greatest note! DSC_1009 FeltButterflyMagnetTutorialSml

Origami Butterfly Wall Art - Tutorial

Sunday, March 25, 2012

ButterflyWallArtAhh, we're back. After a bit of a trying week, we are back. Maybe not normal yet, but better. Up and running. Stronger and with more momentum.

I like that feeling of gearing up. The lists, the planning, the thinking, the ideas and the doing. As a new project takes off, so does my heart and soul. The different possibilities bring optimism into my little corner. This little boost pushes me off my landing spot and into the wind. And I feel free again.

Life is a bit of a roller coaster. That is so cliche, but as I get older, it is so true. My roller coaster travels from intense deep dark blue to the lightest of yellows. My lows are darker, grumpier, and more achy. My highs are light, breezy, and floaty. And it is a fact that my path travels to both ends. Life modulates.

I have tried so hard to control it. "I'd be so much more productive if I could just extend those highs. How do I avoid those lows? Exercise. Diet. Medication. Supplements. Lifestyle." But the only thing I've found to be true, is to embrace it. Rest when the body says to rest. Leave the guilt of nap-time hours behind. Productivity will pick up. It will soon. And without variety, this wouldn't be...life.

So take each day as it comes. Be productive when the body and the inspiration allows. Rest when there is no other choice. And embrace your soul, the time you have here on this earth, and live each day to its fullest. I know I can't do any more than that.

Now, onto the craft....

ButterflyWallArt8
We are sorely in need of some cute wall art in this house. I've been eyeing so many butterflies on the Internet lately and since spring is in the air, I decided to invite some into this home.

I found this site for all things Origami butterfly. I looked at about half the links, but there are so many other patterns out there to explore! Take a look around and see which one you like.

This is a very simple, very budget friendly piece to put together. I found all the items I needed around the house. Most of the project time is spent waiting for paint to dry and folding paper.

Materials:
Damp rag or paper towel
Sand paper (any fine sand paper will do)
Paper or drop cloth to protect the surface on which you intend to paint
Paint brush
White pant (I used flat indoor paint)
Scrap wood (in any dimension, in any shape, here I used 1/2" MDF)

Regular paper (I used 12X12 inch scrapbooking paper, color on one side, and this was totally enough)
Scissors
Ruler
Pencil
Nails (I used 1 1/4 inch long nails and I used about 6 of them)
Hammer

Craft Glue

How To:
NOTE: I did not affix a hanger on the back of my piece. If you would like to hang your piece, select an appropriate wall hanger and attach it to your board, BEFORE you start in on the rest.

1. Sand scrap wood until edges and faces are smooth. Remove any dust and debris with a damp cloth and let dry.

ButterflyWallArt1 ButterflyWallArt2 2. Paint scrap wood white with paint and brush. You many need to do two coats, letting each dry in between.

ButterflyWallArt4 3. Go here to find out how to make the origami butterflies. This is a very complete and easy to follow tutorial in my opinion and she gives you two sizes to choose from.

ButterflyWallArt3 4. Measure and draw as many rectangles for as many butterflies as you'd like. I varied the sizes of mine and I just kept on making them until I got tired of making them!

5. Lay out your butterflies on the white piece of wood. I choose to make them all face more or less one direction. Then choose which you'd like to elevate. These little lucky ones will be mounted atop the nails.

6. With the pencil, draw dots where the nails will be hammered in. Then hammer in your nails. Don't worry if your little butterflies try to take flight while you are hammering, they don't go far, and you can re-arrange them later.

ButterflyWallArt5 ButterflyWallArt7 7. Add a dab of craft glue to the top of each nail, and place the lucky butterfly atop. Adjust it's angle as you please and let dry.

ButterflyWallArt6
8. Apply craft glue to the bottom edges of each butterfly and secure it to the board. Let these butterflies dry.

ButterflyWallArt9 And there you have it. Display and admire your work!

Tile Dominoes - Tutorial

Tuesday, March 20, 2012

TileDomino

Does there need to be anything more said than what is pictured above? Probably not, but here are a few of my words anyway.

I was working and working last week to put together a tutorial for the blog. It was unique pattern for this cool tank top on Anthropologie.com. Internet searches ensued about how to size sewing patterns. Old printer driver install disks were dusted off so I could scan in the pattern on a different computer. Double trips to that big box store that begins with the letter "W" to get just ONE thing each time! Bad, bad, bad light which makes not nice photos. And my model was trying to think about how she could get out of modeling altogether.

After hours and hours and hours of work...and just the final shot of the completed project left to take, and no sunlight in which to take it...I decided to put it all on hold. The post deadline had come and gone, twice. I had moved onto another impossible seeming project. And I started to not like that "hot tank top."

After weaving through the bad-photos of another Anthro-inspired tutorial gone "way-more-complicated-than-I-had-intended," I found myself digging in my home-improvement supply bin. Under dust masks, nail hole filler, vinyl letters, a mini crow-bar, and a laser leveler, I found these stone tiles. Instantly a small voice spoke to me and said, "dominoes!" How easy, how simple, and how, your own idea!

The lesson I learned this weekend was: make it your own. Create your own design. Trying to copy someone else takes so much time and energy. How did they do that? Is my re-creation as good as their original? And sometimes the results are frustratingly for not. Letting your spirit shine in all that you do and creating a life that is from your heart is perhaps the truest form of simple originality.

So on to the tile tutorial...

Materials:

  • Stone tiles (I haven't a clue what kind these are since I got them so long ago.)
  • Enamel pen (mine is Pebeo brand Vitera 160 in Glossy Black.)
How To:
1. Draw away.
2. You can go here for a mathematical explanation of how many tiles to make and how many dots (or pips as they are called) to put on each. (Or you can just follow the picture on the page.)
3. Let dry according to pen's directions. Mine instructions said to air dry for 72 hours.

TileDominoesA

Baby Bunny Stencil - Free Download

Monday, March 12, 2012

BunnyStencilPattern1
This weekend was a whirl wind of crafting, drafting, and computer complications. It was busy inside and beautiful weather outside. I wished I had spent more time enjoying the weather, but when my mind is able, and the kids are otherwise occupied, there is no stopping these crafting fingers.

Working hard on this blog, this creating, building these tutorials is a new intentional commitment for me. I've been blogging for a few years now. Sometimes with fervor and exuberance and sometimes not. The need to express my creative side, connect with others, and build a new revenue stream for our family are the currents that pushed my blogging hobby along. I know that the act of creating, and the discipline to keep creating, can lead to some of the goals I'd love to achieve in the this lifetime. All these thoughts and feelings have led me to the brink of choosing to a path. But fear is holding me back from stepping off and committing.

Lately I've been praying a lot and asking for guidance. Which way should I go? How much should I be concentrating on my family? How much should I be concentrating on my creative talents? What should I be giving and how much? What is it that I am meant to do?

I was reading this passage in the Catholic Herald today and it really hit home for me. In her March 8-14, 2012 Opinion piece, Elizabeth Foss wrote, "St. Isaac of Stella wrote, 'If you desire to know yourself and possess yourself, go into yourself, and do not search for yourself outside. Distinguish between what is around you, what belongs to you, and yourself! Return then, transgressor, to your heart within, where you are truly yourself.' So much of what we believe about ourselves and the way we see ourselves is a reflection of the interactions we have with other people. Moment after moment, day after day, we store up a lifetime of impressions from without. The opinions and the attitudes of other people can shape us, nearly to our very core.

But those impressions cannot touch the innermost reality of who we are. It is only the Holy Spirit in whose likeness we are created who can truly shine a light on who we are intended by our Creator to be, who we become if we are fully united to Christ. A quiet intimacy with God is the truest way to know ourselves."

Many things I've been reading lately are subtly pointing me to this creative outlet, this blog. I love creating new things. I adore working with my hands and designing. God has a funny way giving me tiny hints and pointing me in the right direction just when I think I can't stand it any longer to not know.

I very much enjoy working on these posts and sharing my creative work with others. I hope that you also enjoy what I am posting here and it is useful for you. Stay tuned for more soon!

BunnyStencil6 Today, it is just a quick post. I am working on something a bit more complex for later this week.

BunnyStencil2
This is the a little baby bunny stencil pattern. Downloadable here. Click here for the tutorial about how to create a sweet stenciled little baby tee..

I couldn't for the life of me get a good shot of the finished tee. This crawling baby can cruise at 9 months!! Yikes. And my 4 year old is a little shy about modeling. *sigh* So these funny ones are the ones I get.

BunnyStencil3 BunnyStencil4 BunnyStencil5

Spring Chick Stenciled Baby Tee - Tutorial

Friday, March 9, 2012

ChickTee8Cute round tummies deserve a little spring time adornment. Like say, a cute t-shirt motif that when stretched in the horizontal direction becomes even more cute.

Spring time is on my mind as winter wanes in these parts. Tornadoes in the mid-west, and 70 degree weather here has me wondering what happened to the snowy days of winters past. Lent is here and it is a time for reflection, prayer and penance inside this spirit of mine. I am thinking of Easter and how glad I'll be to see the end of this 40 day ritual of intense personal scrutiny. Not a season I love really. But truly I feel better at the end of it all. Refreshed. Renewed. And ready to meet what is next with hope and openness. I guess that is what Lent, and spring, are about. A new beginning.

And so, I was daydreaming of what reminds me of spring and I thought of little chicks hatching. We had that incubator when I was in grade school. The heat lamp hung low kept those little eggs warm nested in that fresh bed of piney wood shavings. My classmates and I were equally delighted when those tiny new beings finally poked their beaks through their shells and came out into our world. Wet, frumpy, matted, and perhaps not quite as round as the one I pictured above, those tiny little chicks were so very adorably cute.

As I sat in front of the TV watching the Food Network last night, I sketched a couple of chicks. And I've uploaded my favorite draft here.

I turned the sketch into a stencil and created a baby tee for Pie Pie. In all truth, Little Miss can wear this one too with her petite stature. It is for a 24 month-old after-all. It is a bit big on Pie Pie and he kept on moving away from the shot, so these are the best modeled poses I got.

This stencil craft is super easy to create, pretty economical, and very cute. Though, maybe not as cute as the chubby baby cheeks pictured below.

ChickTee7
Materials
  • (1) Baby t-shirt (can also be a onesie, or a long-sleeved t-shirt. What ever you desire. The one pictured here is a 24 month size, but you can size yours to fit.)
  • Fabric paint (I used Folk Art Fabric Paint in #4419 Thicket)
  • Small sponge (you can use a regular stencil "brush" or a small sponge. I just took a scissors and snipped a regular dish sponge in quarters and used that.)
  • Freezer paper
  • Iron + ironing board
  • Piece of cardboard large enough to fit inside the body of the shirt
  • Pencil
  • X-acto knife + old magazine to cut on
  • Chick picture download here and scroll down
How To

ChickTee2
1. Download and print on regular computer paper this chick sketch. Yes, it is for you, and it's for free.

ChickTee3
2. Overlay a piece of freezer paper on top of the sketch print and trace the image onto the paper side with a pencil. (Place freezer paper plastic side down on the print.)

ChickTee4
3. Place freezer paper on top of the old magazine and with an X-acto knife cut out the image along the traced lines. Go slow and pay attention to detail. After, erase the extra pencil lines.

ChickTee5
4. Place a piece of cardboard inside the body of the shirt. Insert the cardboard from the waist end and make sure the cardboard is wide enough to stretch the fabric of the shirt horizontally just slightly. With a hot dry iron (I set mine on the polyester setting and turned off the steam) iron the freezer paper onto the front of the shirt. Pay particular attention to the edges and make sure these are firmly ironed on. If you'd like, cut a very small circle of freezer paper and iron this on to the shirt to place the eye of the chick.

ChickTeeB
5. With a just damp sponge (not wet here), apply the fabric paint to the t-shirt through the stencil. Dab the sponge in the paint and then dab the t-shirt fabric firmly to push the paint into the fabric. Make sure that the entire surface is covered. Do not remove the freezer paper stencil and set the shirt aside to dry completely.

ChickTee6
6. When the paint is dry, carefully remove the paper stencil and set the fabric paint according to the directions on the bottle. Put the tee on your little guy or gal, and start trying to snap those photos!

Outtakes

DSC_0498
Can't see the front of the shirt!

DSC_0504
Really can't see the front of the shirt.

DSC_0514
Okay, can't even see the model now. Photo shoot, that's a wrap.

Inspiration
The Snooty Bird Walk by Vintage Green Creations
Goody Bags for Spring Chickens by Country Living

Polka Dot Dyed Easter Eggs - Tutorial

Wednesday, March 7, 2012

PolkaDotEggs1

I didn't grow up celebrating Easter. We didn't dye eggs, go hunting for them later in the grass outside, or receive baskets of sweets. I remember eyeing with great envy my friend's plastic yellow baskets filled with trinkets, sweets, and plastic green grass. My parents are of Jewish descent.

In 2005 I converted to Catholicism. I did it for me. I did it because it felt right. It just fit. And now, as a wife and mother I am beginning to create family traditions that make the Lenten season and Easter meaningful and beautiful to our young family.

This simple colorful craft project actually didn't include the children. I just slipped into the kitchen and let my crafty fingers fly around a bit and came up with these polka dot dyed Easter eggs.

Materials

  • Eggs (raw and intact, and at room temperature.)
  • Food coloring (just the regular kind from the supermarket) (Goodness, does calling the grocery store a "supermarket" date me a bit I wonder?)
  • White vinegar
  • Paper towels (or a rag you don't mind turning a couple of other colors)
  • Plastic disposable, or rubber gloves (optional if you don't mind getting your fingers a bit dyed)
  • Contact paper (about a 6"x6" piece or so.)
  • X-acto knife
  • Hole punch

How To

PolkaDotEasterEggs1

1. Use the hole punch to punch out dots from the contact paper. Separate the dots from their backing and stick them to the eggs. (An X-acto knife helps here. I held the dot between my forefinger and thumb and then carefully "sliced" the side of the dot with the X-acto knife to separate the two layers.) Firmly press the edges of each dots to adhere. Be a bit random here with your sticking pattern. Or not and create a geometric pattern if you wish.

PolkaDotEasterEgg

2. Mix dyes according to package directions:
1/2 C boiling water + 1 teaspoon white vinegar and 10-20 drops of food coloring (I used teal, dusty rose and yellow.

3. Submerge the egg covered with sticky dots in the hot liquid colors and let them sit for as long as you'd like. The longer you let them sit the more intense the color will be in the end. Mine were in the liquid for only a minute or so. I used plastic gloves to protect my fingers from the dye.

4. Remove the dyed egg and rinse the excess dye off and pat dry with a paper towel. Let dry for 20 minutes or so, before removing the circle stickers. (An X-acto knife helps here.)

5. If you intend to display these, poke holes in the ends and blow them out. I used mine for breakfast the next morning.

Polka Dot Easter Eggs5

Outtakes

  • If you don't firmly adhere the dots to the egg shell, they come off.
  • Blue seems to seep into the little craters in the egg making a speckled effect.

Inspiration
Tissue Paper Decoupage Eggs - How To by Martha Stewart
Scrambled Lines and Letters Easter Eggs - How To by Martha Stewart Polka Dot EasterEggs
Related Posts Plugin for WordPress, Blogger...
Blog contents © Abbie Giving 2010. Blogger Theme by Nymphont.